HonwaySim Suture Guide
I. Foreword & Disclaimer
1. Product Goal: Assisting Medical Students
Our goal at HonwaySim is to assist as many medical students as possible in learning how to suture. That is why we created the HonwaySim Suture kit, eBook & HD video guides. We hope that our product will help you reach your goals.
2. Copyright Warning: No Modification or Resale
This e-Book is a property of HonwaySim and CAN NOT be modified and re-sold for profit. If you attempt to copy this guide and re-sell it for profit, you are liable to get sued.
3. Safety Disclaimer
For demonstration & training purposes only.
The HonwaySim Kit is for demonstration & training purposes only and is not intended for use on humans or animals.
II. HonwaySim Kit & Tool Handling
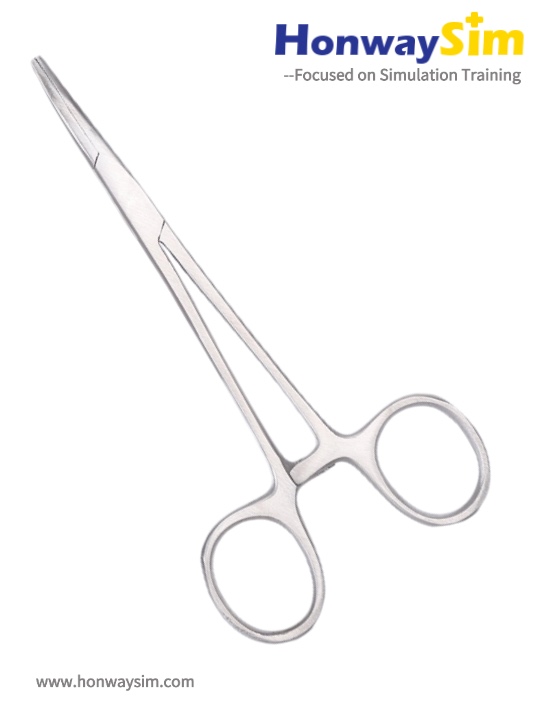
1. Hegar Needle Holder
Function:
This is a primary instrument required when performing a suture. The lacerations in the jaws firmly hold or secure the needle when suturing.
Holding Method:
- Place your thumb in the upper ring, ring finger in the lower ring, and index finger along the shaft for support.
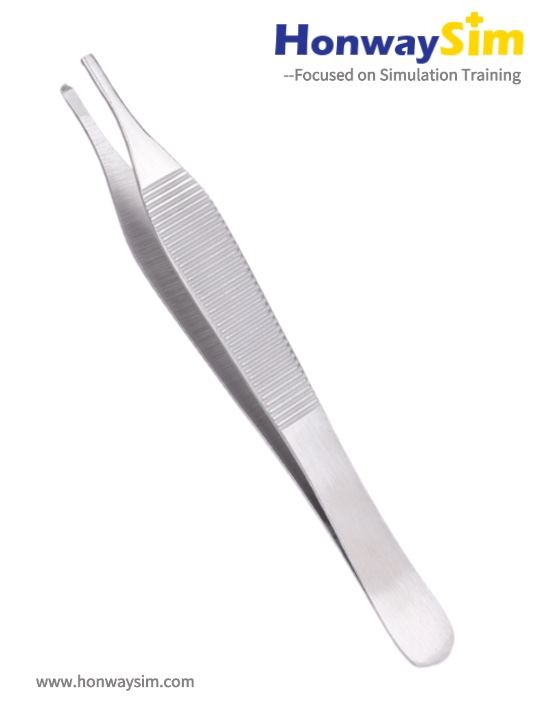
2. Adson Forceps
Function:
Intended for use on handling skin and tissue. Be careful with delicate skin as they can macerate tissue.
Holding Method:
- Use a pencil grip and avoid excessive force.
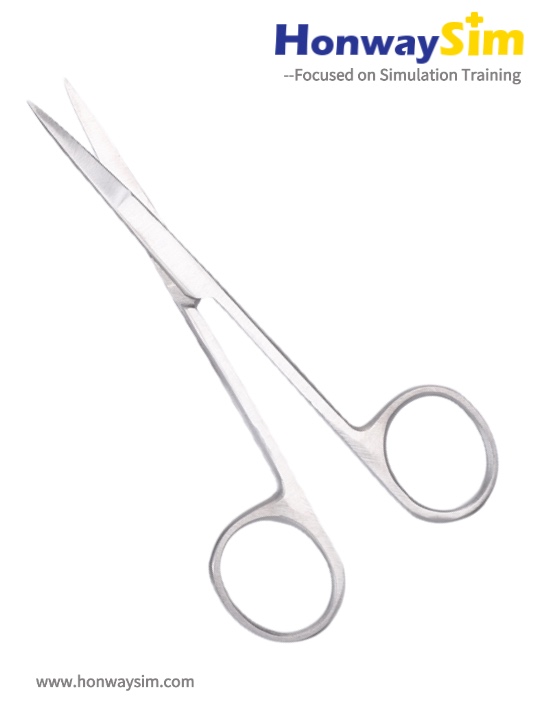
3. Surgical Scissors
Function:
Used for cutting sutures.
Holding Method:
- Same as the needle holder (thumb and ring finger in rings).
4. Scalpel Handle & Blade
Installation Steps (4 Steps):
- Use the needle holder to grip the blunt, top edge of the blade.
- Align the blade's slot with the handle's fitting.
- Slide the blade upward onto the handle.
- Pull back until it clicks securely into place.
Two Grips:
- Pencil Grip: For short incisions.
- Fingertip Grip: For long incisions.
5. Curved Mosquito Forceps
Function: Used for hemostasis (halting blood flow), especially in simulated vascular procedures.
6. Suture & Needle
4 Types Included: Nylon Monofilament, Polypropylene Monofilament, Silk Braided, and Polyester Braided.
Key Point: Grip the needle with the holder at the junction of the middle and posterior thirds (about 2/3 from the point).
7. Suture Practice Pad
Structure: Three layers (skin/fat/muscle).
Features: Includes 14 pre-cut wounds and has a non-slip base.
8. Leather Carry Case
Used for storing the practice pad and all surgical tools for portability and protection.
III. Instrument Ties & Knots
1. Knot Types
This guide focuses on two fundamental instrument-tied knots:
- Square Knot: Composed of two opposing throws.
- Surgeon's Knot: A variation of the square knot with a double-wrap on the first throw for added security against slipping.
2. Knot Tying Method
Key Steps:
- Leave a short tail of about 2cm.
- Wrap the long strand around the needle holder once (for a Square Knot) or twice (for a Surgeon's Knot).
- Grasp the short tail with the holder and pull through to tighten.
- Add 1-3 additional securing throws.
IV. Five Suturing Techniques
1. Simple Interrupted Suture
Application: Small wounds or epidermal layers.
Core Concept: Each stitch is knotted individually with even spacing.
2. Simple Running Suture
Application: Long wounds (e.g., scalp lacerations).
Core Concept: Knot only at the beginning and end, with a continuous running stitch in between.
3. Horizontal Mattress Suture
Application: Fragile skin (e.g., in elderly patients) to distribute tension.
Core Concept: The suture runs parallel to the incision line under the skin, creating a "box" stitch.
4. Vertical Mattress Suture
Application: Wounds under high tension.
Core Concept: A "far-far" deep bite for closure, followed by a "near-near" superficial bite for edge eversion.
5. Running Subcuticular Suture
Application: Areas requiring good cosmetic results (e.g., face).
Core Concept: The suture is passed horizontally within the dermal layer, leaving no visible suture material on the surface.
V. Basic Principles of Suturing
1. Three Key Practices for Good Technique
- Bites on each side of the wound should be equal in depth and distance.
- Knots should be placed to the side of the incision, not on top of it.
- Stitches should be evenly spaced.
2. Common Mistakes to Avoid
The image below illustrates common errors: incorrect knot placement, misaligned wound edges, and uneven stitch spacing.
VI. Additional Resources
1. HD Videos
HD video tutorials are available exclusively for customers who purchased our suture kit.
2. Interactive Quiz
Test your knowledge with the skills quiz linked at the end of the original eBook.
3. Purchase Channel
You can purchase our products on Amazon in the US and Canada. Click the button below to order now!
Order Here on Amazon